Many vinyl collectors unknowingly make critical mistakes when cleaning records, using harsh chemicals, improper tools, or aggressive methods – potentially turning a $100 record into worthless plastic. But don’t worry – it’s time to protect your vinyl investment. Drawing from professional audio restoration experts and extensive research, we’ll reveal the most common mistakes to avoid when cleaning records and show you proven methods to keep your collection in pristine condition for years.
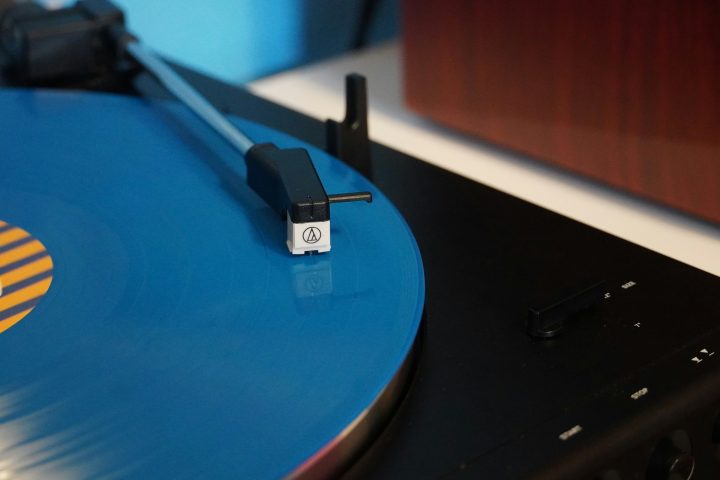
Table of Contents
- Using the Wrong Cleaning Materials
- Skipping Regular Cleaning
- Cleaning Too Aggressively
- Ignoring the Environment
- Not Using a Cleaning Machine When Needed
- Forgetting to Dry Properly
- Neglecting the Stylus
- Keep Your Records Awesome
- FAQs – Mistakes to Avoid When Cleaning Records
Using the Wrong Cleaning Materials
Let’s talk about something that makes vinyl enthusiasts cringe – watching someone clean their precious records with household cleaners. Your vinyl collection deserves better than a quick wipe with window cleaner or rubbing alcohol. These harsh chemicals might seem like they’re doing the job, but they’re eating away at the delicate grooves that make the magic happen.
Think of your records like fine art – you wouldn’t clean a Picasso with Windex, right? Alcohol-based cleaners are particularly sneaky villains. They might leave your records looking shiny, but they’re secretly stripping away the protective compounds that keep your vinyl playing smoothly.
When it comes to cleaning tools, using old t-shirts, paper towels, or general-purpose cleaning cloths is like using sandpaper on your records. Your best bet is a high-quality microfiber cloth paired with distilled water and an alcohol-free cleaning solution made specifically for vinyl.
Think of proper cleaning materials as an insurance policy for your collection. A quality microfiber cloth might cost more than grabbing an old shirt from your drawer, but it’s a small price to pay compared to replacing damaged records. Even brand-new microfiber cloths should be washed before their first use – some manufacturing residues can linger, and you don’t want those transferring to your records.
Skipping Regular Cleaning
Let’s talk about one of the biggest mistakes vinyl enthusiasts make – thinking their records only need cleaning when they “look” dirty. Here’s the thing: dust and debris are constantly settling on your vinyl, even when it’s sitting innocently in its sleeve. Those tiny particles might seem harmless, but they’re like miniature wrecking balls in your record’s grooves.
When you skip regular cleaning sessions, you’re not just dealing with a bit of surface dust. Those particles get pushed deeper into the grooves by your stylus, creating a compacted layer that becomes harder to remove over time. It’s like letting snow pile up on your driveway – sure, you could wait until it’s a foot deep, but wouldn’t it be easier to shovel a little bit each day?
Your turntable’s stylus is probably the most delicate (and expensive) part of your setup, and forcing it to plow through dirty grooves is like making it navigate an obstacle course blindfolded. Every time you play a dirty record, that gunk in the grooves gets heated up and compressed by your stylus, essentially baking it into the vinyl’s surface. The good news? A simple weekly cleaning routine can prevent all these headaches.
Related: Complete Guide to Vinyl Record Cleaning Equipment
Cleaning Too Aggressively
Have you ever seen someone scrubbing their records like they’re trying to remove baked-on lasagna from a casserole dish? That’s a surefire way to turn your favorite album into a very expensive coaster. Vinyl records are surprisingly delicate – those microscopic grooves that create your music can be permanently damaged by overzealous cleaning.
When you’re cleaning your records, think of it more like dusting a butterfly’s wings than scrubbing your kitchen counter. Let the cleaning solution and gravity do most of the work. A light touch with your anti-static brush or microfiber cloth is all you need – just enough pressure to make contact with the surface. If you’re pressing hard enough to see the record flex or bend, you’re using too much force.
Try holding your cleaning cloth or brush as if you were holding a feather. This gentle grip naturally limits how much pressure you can apply. Start from the center and work your way out in straight lines, following the grooves. Circular motions might feel natural (the record is round, after all), but they can push debris right back into the grooves you just cleaned.
Ignoring the Environment
Do you know what’s just as important as your cleaning technique? Where you’re doing it. Setting up your cleaning station in the wrong spot can turn a simple maintenance task into a frustrating battle against static, dust, and humidity. Ever wonder why your freshly cleaned records seem to attract dust like a magnet? Your environment might be working against you.
Think of vinyl like a houseplant – it’s happiest in just the right conditions. There is too much humidity, and you’re trying to clean your records in a sauna, trapping moisture in those delicate grooves. Too dry, and you’re in the static city, where every dust particle within a mile radius seems magnetically drawn to your collection. The sweet spot? Keep your cleaning area’s humidity between 45-55%.
Your cleaning station needs to be like a surgeon’s operating room – clean, organized, and free from contaminants. That means no open windows letting in fresh dust, no ceiling fans spinning overhead (they’re just dust redistributors in disguise), and definitely no smoking or vaping nearby. Set up your station away from air vents and use a wooden work surface – it naturally helps dissipate static charge. Running a humidifier for 15 minutes before you start can knock down static levels dramatically, just keep it at a safe distance from your cleaning area.
Related: Groovewasher Record Cleaning Kit – Practical Guide
Not Using a Cleaning Machine When Needed
Manual cleaning with a brush and solution works fine most of the time. But there comes a point in every serious collector’s journey when bringing in the big guns becomes necessary. Maybe it’s after scoring an incredible vintage find that’s been sitting in someone’s basement for decades, or perhaps when a prized collection shows signs of deep-seated grime that regular cleaning routines just can’t tackle.
Think of a record cleaning machine like a pressure washer for your house – sometimes that garden hose just won’t cut it. Ultrasonic cleaners use high-frequency sound waves to create tiny bubbles that implode, literally blasting away dirt from places a microfiber cloth could never reach. Meanwhile, vacuum-based cleaning machines remove contaminated cleaning solution completely, unlike manual wiping which just moves dirt around.
The investment might seem steep at first, but when dropping serious cash on rare pressings or building a collection that’ll last generations, skimping on proper cleaning equipment is like buying a Ferrari and never changing its oil. For those tough cleaning jobs – like records with decades of built-up grime or mysterious sticky residue – a quality cleaning machine isn’t just helpful, it’s essential. These machines complement rather than replace regular cleaning routines.
Forgetting to Dry Properly
You’ve just given your records a thorough cleaning, but don’t pat yourself on the back just yet – how you dry them is just as crucial as how you clean them. It’s like doing your laundry but skipping the dryer – you’re only doing half the job. Letting records air dry without proper attention is like rolling out the welcome mat for water spots and potential mold growth.
Think of those tiny droplets of cleaning solution sitting in those microscopic grooves, eventually evaporating and leaving behind mineral deposits. These little troublemakers can cause everything from annoying pops and clicks to permanent sound distortion. It’s like leaving water spots on your car after washing it – except these spots are messing with your music.
A proper drying rack keeps your vinyl perfectly horizontal while allowing air to circulate evenly across both sides. The real magic happens with a high-quality lint-free cloth – and yes, it needs to be a different one than what you used for cleaning. Work from the center outward with gentle, straight-line motions, like drying a prized photograph. Once you’ve removed the visible moisture, give your records some quality time on a drying rack. This extra step might seem like overkill, but it’s like letting a good steak rest after cooking – patience pays off in the end.
Neglecting the Stylus
Your stylus is like a tiny explorer, diving deep into those record grooves thousands of times during each play. But when was the last time you gave this mini-adventurer a proper cleanup? A dirty stylus isn’t just affecting your sound quality – it’s acting like a microscopic bulldozer, pushing accumulated gunk back into your record’s grooves with every rotation.
That tiny diamond tip is operating under immense pressure, with tons per square inch concentrated on a point smaller than a human hair. Now imagine that point collecting dust, old vinyl particles, and skin oils. Every time it drops into a groove, it’s not just playing your music – it’s potentially embedding all that collected debris right into your records.
When you start hearing more surface noise than usual, or music starts sounding muddy even on your cleanest records, your stylus is crying out for attention. A dedicated stylus brush isn’t just a fancy accessory – it’s essential equipment. For stubborn buildup, a stylus gel works wonders, like those sticky hand toys we played with as kids, but for microscopic debris.
Remember to clean from back to front with a gentle touch, letting the cleaning material do the work. Your stylus deserves proper cleaning products designed specifically for this delicate task.
Keep Your Records Awesome
Taking care of your records isn’t rocket science – it just takes the right tools and a bit of know-how. Getting into good cleaning habits now means you’ll dodge those common mistakes that can mess up your vinyl collection. Keep it simple, keep it clean, and keep those records spinning. Your future self will thank you for taking such good care of your collection.
FAQs – Mistakes to Avoid When Cleaning Records
What should you not clean vinyl records with?
Never clean vinyl records with household cleaners, alcohol-based solutions, or abrasive materials. Avoid paper towels, clothing, or general-purpose brushes. Don’t use tap water due to its mineral content. Steer clear of WD-40, bleach, or any harsh chemicals – these can strip the record’s protective coating and permanently damage the grooves.
How do you clean records properly?
Clean records using a carbon fiber brush for light dust, or a specialized record cleaning solution with a microfiber cloth for deeper cleaning. Always clean in a circular motion, following the grooves. Use a record-cleaning machine for best results. Apply minimal pressure and ensure the record is completely dry before playing.
What destroys vinyl records?
Vinyl records are destroyed by improper handling, extreme temperatures, direct sunlight, stacking horizontally, and incorrect storage. Using dirty needles, playing warped records, or leaving them out of sleeves can cause permanent damage. Improper cleaning methods, like using harsh chemicals or abrasive materials, will also ruin the vinyl’s grooves.
Is it okay to clean vinyl records with water?
Distilled water can be used to clean vinyl records, but never use tap water due to minerals and impurities. Always mix distilled water with a proper record-cleaning solution. Never submerge records in water or let them stay wet – moisture can seep into the label and damage the vinyl’s material.